
Honda HR-V: Clock
Adjusting the Clock
Models without navigation system
You can adjust the time in the clock display with the ignition switch is in ON (II)*1.
■Adjusting the Time
■ Display audio system
1. Select the .png) (HOME) icon, then
(HOME) icon, then
select
Settings.
2. Select System, Clock, then Clock Adjustment.
3. Adjust the hours and minutes by selecting
.png) .
.
4. Select OK to set the time.
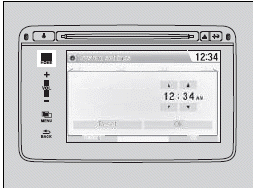
The clock in the information display is automatically adjusted along with the audio system's clock display.
Models with navigation system
The clock is automatically updated through the navigation system, so the time does not need to be adjusted.
Models without navigation system
You can customize the clock display to show the 12 hour clock or 24 hour clock.
You can turn the clock display on and off.
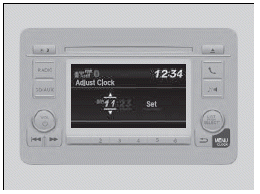
■ Color audio system
1. Press and hold the MENU/CLOCK button.
- Adjust Clock is selected.
2. Rotate .png) to change hour, then
to change hour, then
press .png) .
.
3. Rotate .png) to change minute, then
to change minute, then
press .png)
.
4. To enter the selection, rotate .png)
and select
Set, then press .png) .
.
These indications are used to show how to operate the LIST/SELECT (List/Selector) knob.
Rotate .png) to select.
to select.
Press to enter.
You can also select Adjust Clock by pressing the MENU/CLOCK button.
Rotate .png) to select Adjust Clock, then
to select Adjust Clock, then
press .
READ NEXT:
 Key Types and Functions
All the keys have an immobilizer system. The
immobilizer system helps to protect against vehicle
theft.
The keys contain precision electronics.
Adhere to the following advice to prevent damage to
the
Locking/Unlocking the Doors from the Outside
■Using the Remote Transmitter
■ Locking the doors
Press the lock button.
Once:
Some exterior lights flash, all the doors
and tailgate lock, and the security system
sets.
Twice (within five se
SEE MORE:
HFL Menus
The ignition switch must be in ACCESSORY (I) or ON (II) to use HFL.
To use HFL, you must first pair your Bluetooth-compatible
cell phone to the system while the vehicle
is parked.
Some functions are limited while driving. A message
appears on the screen when the vehicle is moving
and the operation
Front Damper/Spring Removal and Installation
Removal & Installation
1. Vehicle - Lift
2. Front Wheel - Remove
3. Stabilizer Link - Disconnect
Disconnect the stabilizer link from the damper.
4. Damper/Spring Items - Remove
Fig. 1: Brake Hose Mounting Bolt With Torque Specifications
Remove the brake hose mounting bolt (A)
Remove the w
