Honda HR-V: Cylinder Head Assembly - Inspection & Adjustment
Honda HR-V (2015-2021) Service Manual / Engine / Cylinder Head Assembly - Inspection & Adjustment
INSPECTION & ADJUSTMENT
CYLINDER HEAD INSPECTION FOR WARPAGE
Inspection
1. Cylinder Head - Remove
2. Cylinder Head Warpage - Inspect
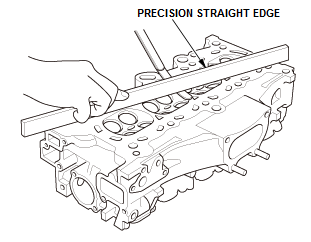
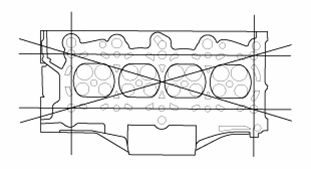
- Check the cylinder head for warpage. Measure along
the edges, and three ways across the center:
- If warpage is less than 0.08 mm (0.0031 in) cylinder head resurfacing is not required.
- Maximum resurface limited to the cylinder head height standard as shown.
Standard (New): 0.08 mm (0.003 in) max.
Standard (New): 114.95-115.05 mm (4.5256-4.5295 in)
3. All Removed Parts - Install
- Install the parts in the reverse order of removal.
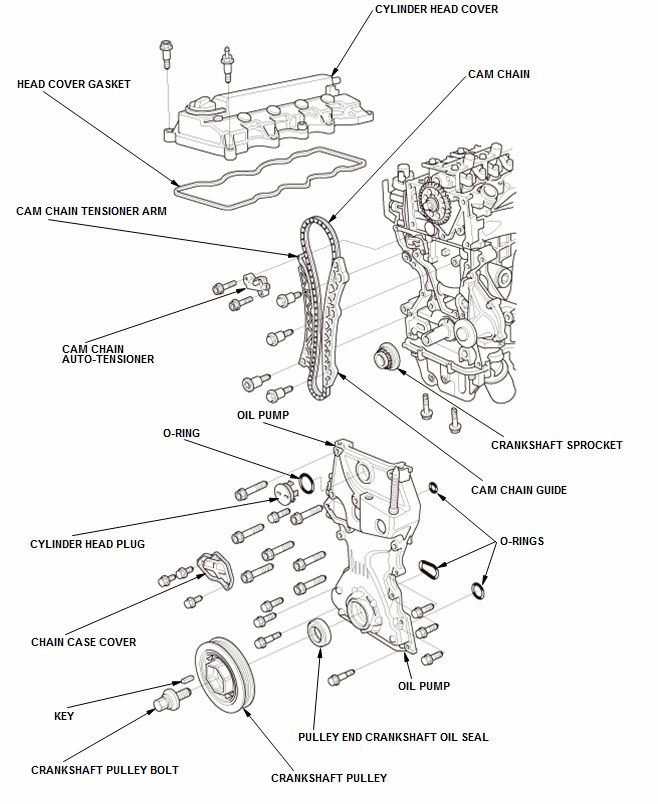
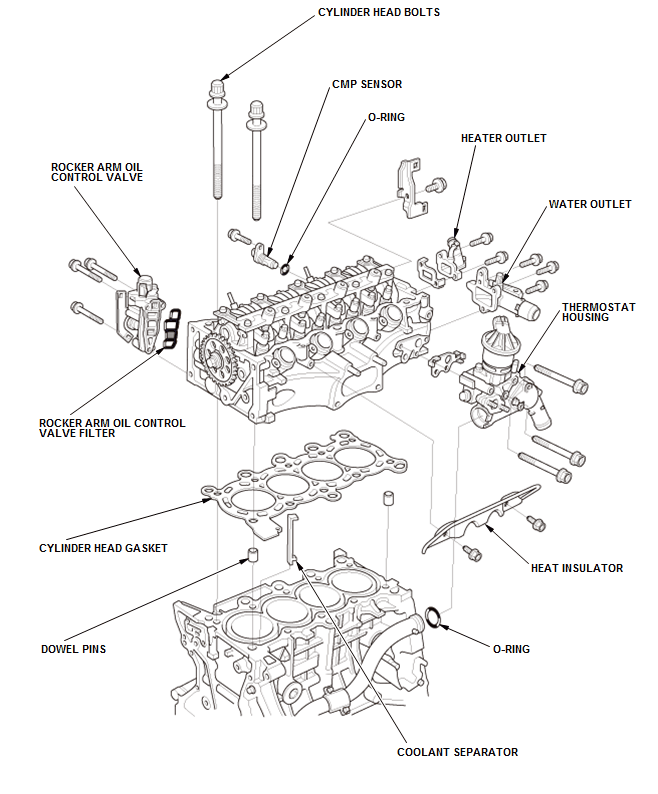
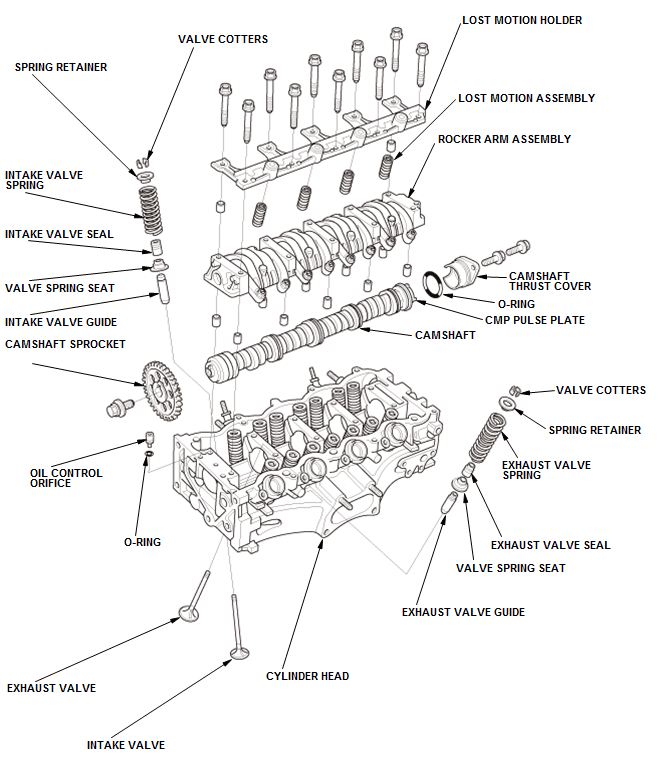
COMPONENT LOCATION INDEX
CYLINDER HEAD ASSEMBLY COMPONENT LOCATION INDEX
READ NEXT:
 A/F Sensor Removal and Installation
Special Tools Required
O2 Sensor
Wrench Snap-on
S6176 or
equivalent,
commercially
available
Removal & Installation
1. A/F Sensor - Remove
Fig. 1: A/F Sensor With Torque Specification
Disconnec
Air Cleaner Element Removal, Installation, and Inspection
Removal & Installation
1. Air Cleaner Element - Remove
Removal & Installation
Air Cleaner Element - Remove
2. All Removed Parts - Install
Install the parts in the reverse order of remov
SEE MORE:
Connector Inputs and Outputs
AUDIO SYSTEM ELECTRONIC WIRING DIAGRAM
Please see appropriate system wiring diagram. ELECTRICAL SYSTEM - TESTING &
TROUBLESHOOTING
AUDIO UNIT CONNECTOR FOR INPUTS AND OUTPUTS (COLOR AUDIO TYPE (5-INCH
SCREEN) )
Connector Index
Audio Unit Connector A (24P)
Audio Unit Connector C (24P)
Audio Uni
Fuel Fill Door Opener Removal and Installation
Removal & Installation
1. Driver's Kick Panel - Remove - Refer to: Interior Trim Removal and
Installation - Door Areas, or
Interior Trim Removal and Installation - Tailgate Areas, or Interior Trim
Removal and Installation
- Rear Side Area, or Interior Trim Removal and Installation - Cargo Area
© 2019-2026 Copyright www.hohrv2.com
