Honda HR-V: Ignition System - Service Information
Honda HR-V (2015-2021) Service Manual / Engine / Ignition System - Service Information
REMOVAL & INSTALLATION
IGNITION COIL AND SPARK PLUG REMOVAL AND INSTALLATION
Removal and Installation
1. Harness Cover - Remove
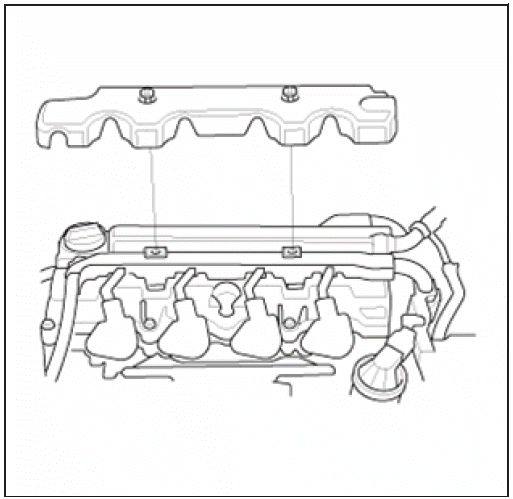
2. Ignition Coil - Remove
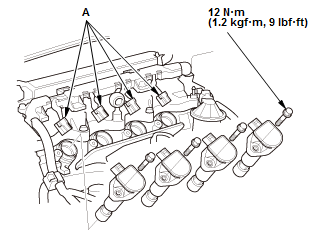
Fig. 1: Ignition Coil With Torque Specifications
- Disconnect the connectors (A)
- Remove the ignition coils.
3. Spark Plug - Remove
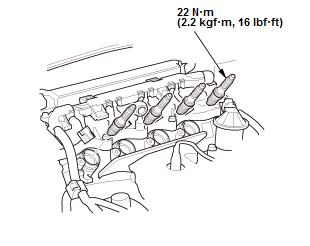
Fig. 2: Spark Plug With Torque Specifications
4. All Removed Parts - Install
- Install the parts in the reverse order of removal.
NOTE: When the spark plugs install, apply a small amount of anti-seize compound to the spark plug threads, and screw the spark plugs into the cylinder head, finger-tight, then tighten the spark plugs to the specified torque.
5. Maintenance Minder - Reset (With Maintenance Minder System).
- If the Maintenance Minder required to replace the spark plugs, reset the Maintenance Minder with the gauge (see "Resetting the Maintenance Minder").
READ NEXT:
 Ignition System - Inspection & Adjustment
INSPECTION & ADJUSTMENT
IGNITION TIMING INSPECTION
Inspection
1. HDS DLC - Connect
NOTE: For specific operations, refer to the user's manual that came with the
HDS. Make sure the
HDS is loaded wi
Cylinder Head Cover Removal and Installation
Removal
1. Harness Cover - Remove
2. Positive Cable and Connector (Alternator) - Disconnect
NOTE: Remove the positive cable clamp at the same time.
3. Cylinder Head Cover Harness Holder - Move
Disc
SEE MORE:
DTC B0029-11
NOTE:
Before doing this troubleshooting procedure, find out if the vehicle was
in a collision. If so, verify
that all the required components were replaced with new components of the
correct part number,
and that they were properly installed.
Before doing this troubleshooting procedure, rev
How to Refuel
1. Stop your vehicle with the service station
pump on the left side of the vehicle in the
rear.
2. Turn off the engine.
3. Pull on the fuel fill door release handle
under the lower left corner of the
dashboard.
The fuel fill door opens.
4. Remove the fuel fill cap slowly. If you hear a
release
© 2019-2026 Copyright www.hohrv2.com
