Honda HR-V: Valve, Spring, and Valve Seal Removal and Installation
Special Tools Required
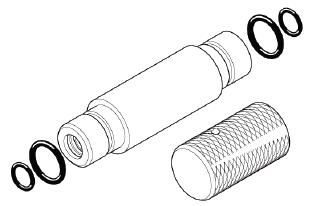
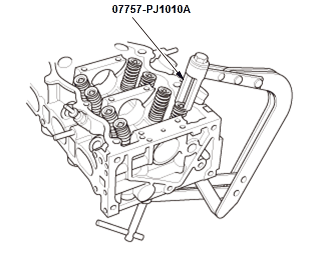
Valve Spring Compressor Attachment 07757-PJ1010A
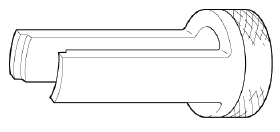
Stem Seal Driver 07PAD-0010000
Removal
NOTE: Identify the valves and the valve springs as they are removed so that each item can be reinstalled in its original position.
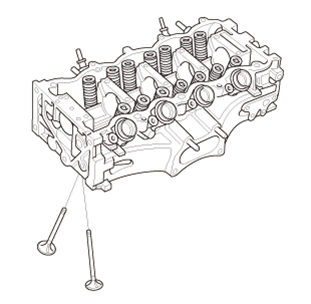
1. Cylinder Head - Remove
2. Camshaft - Remove
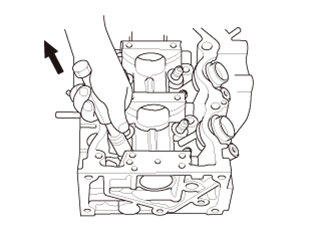
3. Spring Retainer, Valve Spring, and Valve - Remove
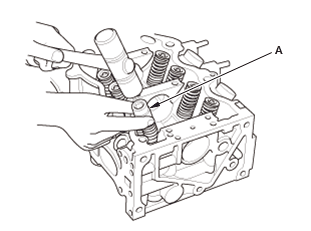
- Using an appropriate-sized socket (A) and a plastic mallet, lightly tap the spring retainer to loosen the valve cotters.

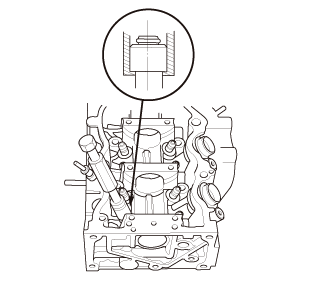
- Install the valve spring compressor attachment and the valve spring compressor
- Compress the valve spring, and remove the valve cotters
- Remove the valve spring compressor attachment and the valve spring compressor
- Remove the spring retainer, the valve spring, and the valve.
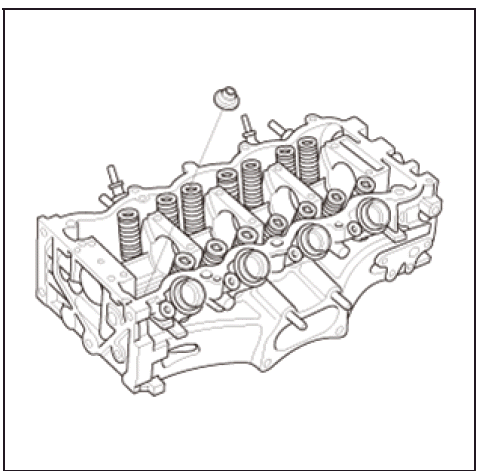
4. Valve Seal - Remove
- Install the valve guide seal remover
- Remove the valve seals.
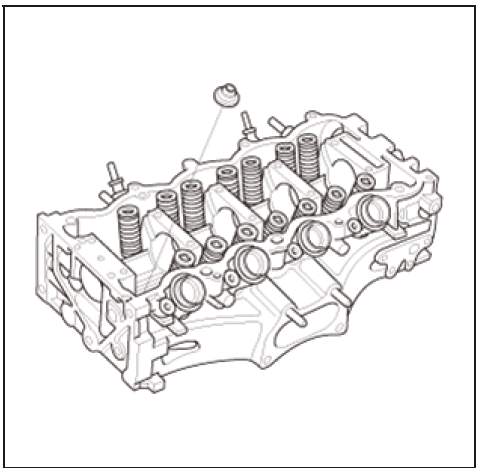
5. Valve Spring Seat - Remove
Installation
1. Valve Spring Seat - Install
2. Valve Seal - Install
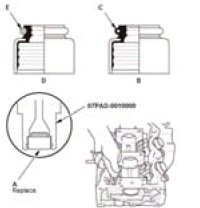
- Coat the new valve seals (A) with new engine oil
- Install new valve seals using the 5.5 mm side of the stem seal
driver.
NOTE : Exhaust valve seal (B) has a black spring (C), and intake valve seal (D) has a white or silver spring (E); they are not interchangeable.
3. Valve, Valve Spring, and Spring Retainer - Install
- Coat the valve stems with new engine oil
- Install the valves in the valve guides
- Check that the valves move up and down smoothly.
- Install the valve spring and the spring retainer. Place the end of the valve spring with closely wound coils toward the cylinder head
- Install the valve spring compressor attachment and the valve spring compressor
- Compress the valve spring, and install the valve cotters
- Remove the valve spring compressor attachment and the valve spring compressor.
- Lightly tap the end of each valve stem two or three times with a plastic
mallet to ensure
proper seating of the valve and the valve cotters. Tap the valve stem only
along its axis so
you do not bend the valve stem.
NOTE: Be sure to raise the cylinder head off the work bench to avoid damaging the valve.
4. Camshaft - Install
5. Cylinder Head - Install
WARM UP TWC REMOVAL AND INSTALLATION (KA/KC)
Removal & Installation
NOTE: Unless otherwise indicated, illustrations used in the procedure are for 2WD.
1. A/F Sensor - Remove
2. EGR Pipe - Remove
3. Engine Undercover (2WD) - Remove
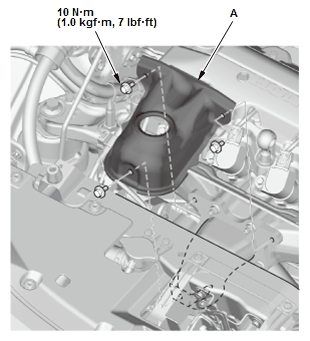
4. WU-TWC Lower - Separate
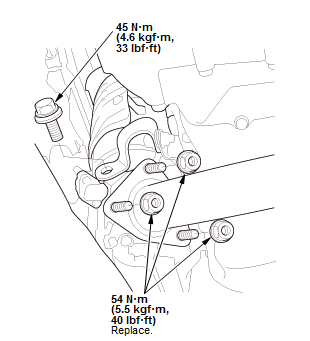
Fig. 38: Warm Up TWC With Torque Specifications
- Remove the bolt and nuts.
5. Vehicle - Lift
- Lower the vehicle.
6. WU-TWC - Remove
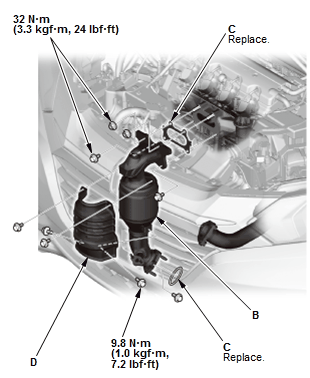
Fig. 39: Warm Up TWC With Torque Specifications
- Remove the cover (A)
- Remove the WU-TWC (B) and the gaskets (C)
- Remove the WU-TWC cover (D).
7. All Removed Parts - Install
- Install the parts in the reverse order of removal with new gaskets and nuts.
READ NEXT:
 APP Sensor Signal Inspection
Inspection
NOTE:
This procedure checks the APP sensor in its fully closed position. In
any other position, the APP sensor
stores DTCs which are covered in other troubleshooting procedures.
Check
SEE MORE:
Heater Outlet Removal and Installation
Removal and Installation
1. Engine Coolant - Drain
2. Intake Air Duct - Remove
3. Heater Hose and Water Bypass Hose - Disconnect
Disconnect the heater hose (A) and the water bypass hose
(B).
4. Heater Outlet - Remove
Remove the hose clamp bracket
Remove the heater outlet.
5. All Removed Pa
A/C Signal Circuit Troubleshooting (KA)
NOTE:
Do not use this troubleshooting procedure if any of the following items
are operative with the A/C button
and the fan control dial ON: The A/C condenser fan, the radiator fan, or the
A/C compressor. Refer to the symptom troubleshooting index - Refer to:
Heating and A/C Systems Symptom
